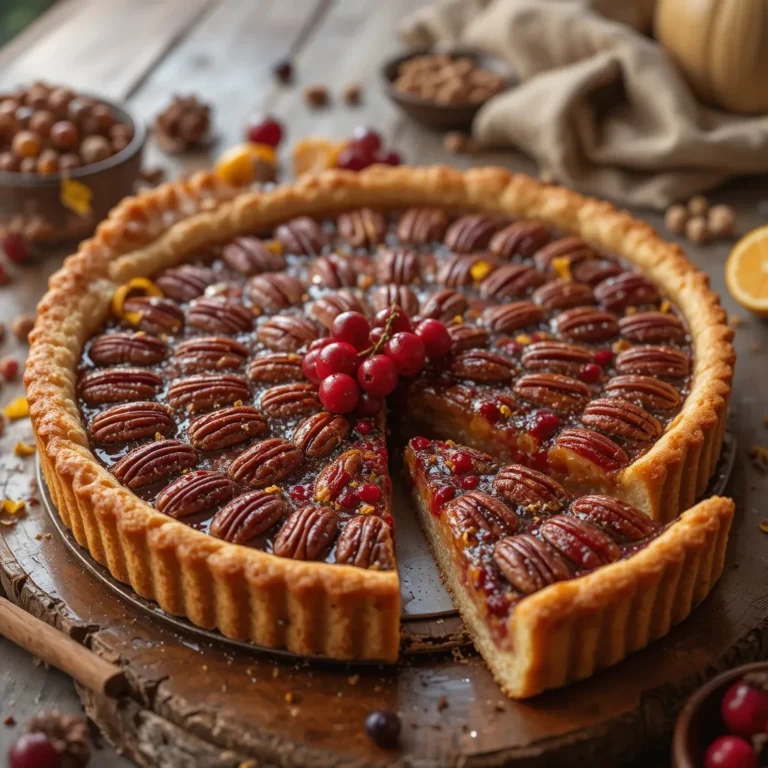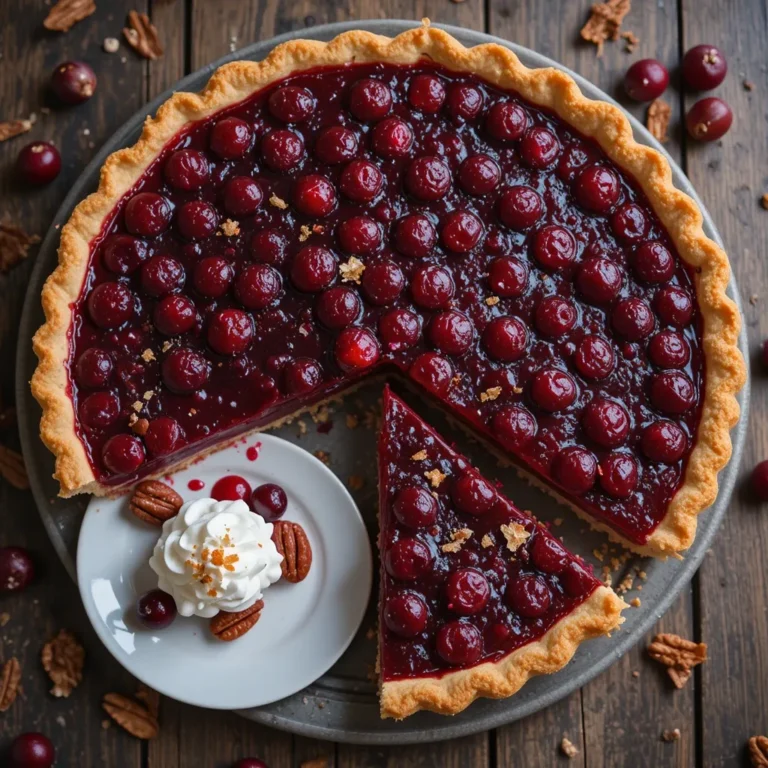
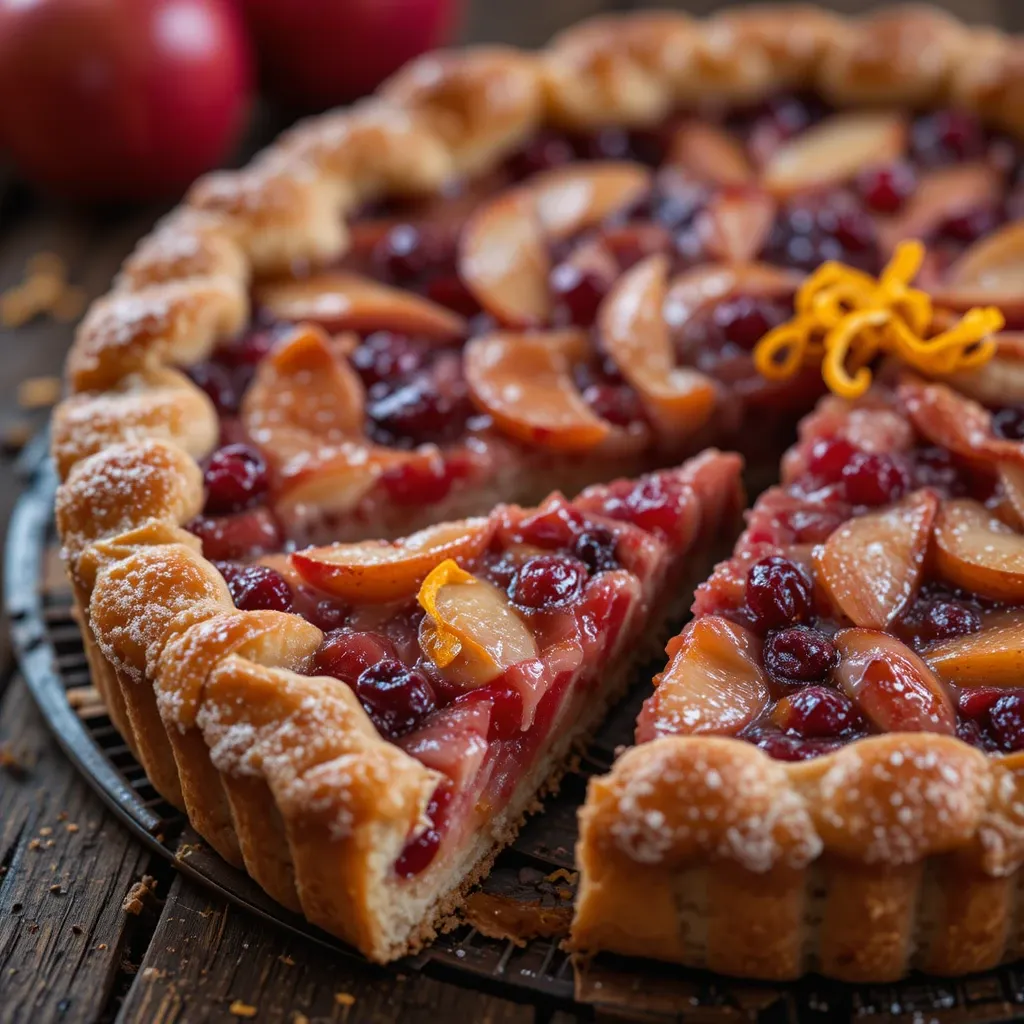
The Best Cranberry and Apple Tart Easier Than You Think
Picture this: it’s a chilly November afternoon, and my kitchen smells like butter, cinnamon, and tart cranberries mingling with sweet apples. The golden crust is just starting to peek through the fruit topping, creating those beautiful caramelized edges I’ve come to love. That’s the magic of a perfectly baked cranberry and apple tart, and honestly? It never gets old.
I’ve been making this cranberry and apple tart for about four years now, and it’s become my go-to dessert whenever I need something that looks fancy but doesn’t require pastry school expertise. The first time I attempted it, I was terrified of the whole “making a tart” thing – it sounded so much more intimidating than a regular pie. Turns out, I was overthinking it. Big time.
What I love most about this dessert is how it strikes that perfect balance between tart and sweet. The cranberries bring this zingy, almost jewel-like quality that cuts through the buttery crust, while the apples add natural sweetness and that comforting, familiar flavor we all crave during fall and winter. And let’s be honest – it looks absolutely stunning on a dessert table. Like something you’d see in a fancy bakery window, but you made it in your own kitchen. That feeling? Priceless.
Why This Cranberry and Apple Tart Deserves a Spot in Your Recipe Box
Here’s the thing about this recipe – I’ve tested it probably fifteen times at this point (my family hasn’t complained once), and I’ve figured out exactly what makes it work every single time. It’s one of those recipes that seems impressive but is actually pretty forgiving once you understand the basics.
It Won’t Intimidate Beginner Bakers
If you can roll out dough and chop fruit, you’re already 90% of the way there. I promise. My sister-in-law, who claims she “can’t bake,” made this last Thanksgiving and sent me a photo of her gorgeous tart. The crust was golden, the fruit was bubbling, and she couldn’t believe she’d actually pulled it off. That’s the beauty of this recipe – it builds your confidence.
The Flavor Combination Is Pure Magic
There’s something about the tartness of cranberries meeting the mellow sweetness of apples that just works. Add a little orange zest (don’t skip this – it’s a game-changer), some warm cinnamon, and a buttery, flaky crust, and you’ve got a dessert that makes people ask for the recipe. Every. Single. Time.
It’s More Versatile Than You Think
Need a Thanksgiving dessert? Check. Holiday brunch showstopper? Absolutely. Random Tuesday when you’re craving something special? Yes, yes, yes. I’ve served this warm with vanilla ice cream for dinner parties and cold with coffee for breakfast (no judgment here), and it’s perfect both ways.
Your Kitchen Will Smell Absolutely Amazing
I’m talking about that warm, spiced, fruity aroma that makes everyone wander into the kitchen asking when dessert will be ready. My neighbor once texted me asking what I was baking because the smell drifted through her open window. True story.
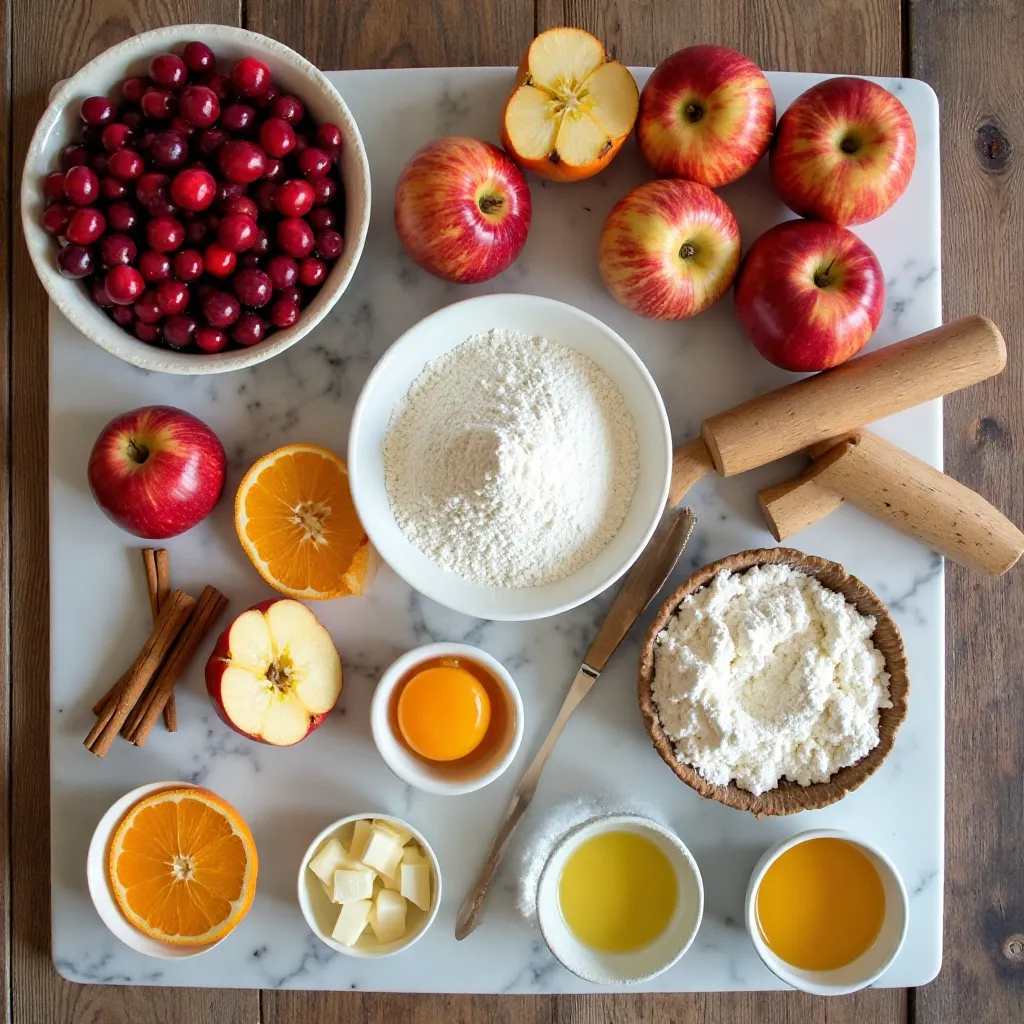
What You Need for Cranberry and Apple Tart
Let me walk you through what you’ll need for this beauty. The ingredient list might look a little long, but I bet you already have half of this stuff in your pantry. And trust me, each ingredient plays an important role in creating those perfectly balanced flavors.
| Recipe Details | |
|---|---|
| Prep Time | 25 minutes |
| Cook Time | 45 minutes |
| Total Time | 70 minutes (plus cooling) |
| Servings | 8-10 slices |
| Difficulty | Medium |
| Calories | 285 per serving |
| Protein | 3g |
| Carbs | 42g |
| Fat | 12g |
For the Crust:
- 1 ½ cups all-purpose flour
- ½ cup unsalted butter, cold and cubed (I keep mine in the freezer for 10 minutes before using)
- 3 tablespoons granulated sugar
- ¼ teaspoon salt
- 3-4 tablespoons ice water
- 1 egg yolk (saves the day when the dough needs binding)
For the Filling:
- 2 cups fresh cranberries (frozen works too – just don’t thaw them first)
- 3 medium Granny Smith apples, peeled and thinly sliced
- ¾ cup granulated sugar (you can reduce to ⅔ cup if you prefer less sweet)
- 2 tablespoons cornstarch
- 1 teaspoon ground cinnamon
- Zest of 1 orange (seriously, don’t skip this)
- 2 tablespoons orange juice
- 1 tablespoon butter, cut into small pieces
- 1 tablespoon turbinado sugar for topping (optional, but it creates a gorgeous sparkly finish)
My Ingredient Notes
The cranberries are what make this tart special – they hold their shape during baking and provide these gorgeous pops of red color throughout. I prefer fresh cranberries during the season, but I always keep a couple bags in the freezer for year-round baking.
For the apples, Granny Smith is my ride-or-die choice because they don’t turn to mush in the oven. I learned this the hard way when I once used Red Delicious (rookie mistake) and ended up with apple sauce inside my tart. Not the vibe we’re going for.
The orange zest is non-negotiable in my opinion. It brings this bright, citrusy note that makes the whole dessert taste more complex and “elevated.” My mom always says it’s the secret ingredient that makes people wonder what that special something is.
How to Make Cranberry and Apple Tart
Alright, let’s get into the actual process. I’m going to walk you through this step-by-step, and I promise it’s more straightforward than you might think. The first time I made this, it took me about an hour and a half total. Now? I can have it in the oven in about 35 minutes.
Step 1: Make Your Crust
Start by combining your flour, sugar, and salt in a large bowl. Add those cold butter cubes and use a pastry cutter (or your fingers – I won’t tell) to work the butter into the flour until the mixture looks like coarse crumbs with some pea-sized pieces of butter remaining. Those butter pieces are your friends – they create the flaky layers we love.
Mix your egg yolk with 3 tablespoons of ice water, then drizzle it over the flour mixture. Use a fork to bring the dough together. If it’s still too dry and crumbly, add that fourth tablespoon of water, one teaspoon at a time. You’ll know it’s ready when you can squeeze a handful and it holds together without being sticky.
Form the dough into a disk, wrap it in plastic wrap, and refrigerate for at least 30 minutes. I usually do this part in the morning if I’m serving the tart for dinner – it’s nice to get it out of the way.
Step 2: Prepare Your Fruit Filling
While your dough is chilling (literally and figuratively), let’s get the filling ready. In a large bowl, toss together your cranberries, sliced apples, sugar, cornstarch, cinnamon, orange zest, and orange juice. I like to use my hands for this part to make sure everything gets evenly coated. The mixture will look a little dry at first, but the fruit releases moisture as it bakes – trust the process.
Here’s something I learned after many attempts: let this mixture sit for about 10 minutes after mixing. The cranberries will start to soften slightly and the sugar begins to dissolve, which helps everything meld together beautifully.
Step 3: Roll and Shape Your Tart
Preheat your oven to 375°F (190°C). On a lightly floured surface, roll your chilled dough into a 12-inch circle about ⅛-inch thick. Don’t stress if it’s not perfectly round – rustic tarts are supposed to have character! I transfer mine to a parchment-lined baking sheet because I’m making a free-form tart, but you can absolutely use a 9-inch tart pan if you prefer a more traditional look.
If your dough cracks while rolling (happens to me all the time), just pinch it back together or patch it with a scrap piece. Nobody will ever know once it’s baked.
Step 4: Assemble Your Beautiful Tart
Arrange your fruit mixture in the center of the dough, leaving about a 2-inch border around the edges. I like to distribute the cranberries evenly throughout so every slice gets that gorgeous red pop of color. Dot the top of the fruit with those small pieces of butter – this adds richness and helps create a slightly glossy finish on the fruit.
Now for the fun part: fold the edges of the dough up and over the fruit, pleating as you go. Don’t worry about making it perfect – those imperfect pleats are what give it that beautiful, homemade look. I’ve noticed that the more I fuss with it, the worse it looks, so I try to work quickly and confidently.
Step 5: The Finishing Touches
Brush the exposed crust with a little milk or cream (I use whatever I have on hand), then sprinkle with turbinado sugar. This creates that bakery-worthy golden, sparkly crust that makes the tart look extra special. It takes literally 30 seconds and makes such a difference.
Step 6: Bake to Golden Perfection
Slide your tart into the preheated oven and bake for 45-50 minutes. You’ll know it’s done when the crust is deeply golden brown and the fruit filling is bubbling in the center. The edges should look crispy and slightly caramelized. My kitchen timer is set for 45 minutes, but I always check visually because every oven is different.
When I first started making this, I kept taking it out too early because I was worried about the crust getting too dark. Big mistake. A deeply golden crust isn’t burnt – it’s properly baked and will have the best flavor and texture. Wait for those bubbles in the center, I promise it’s worth it.
Let the tart cool on the baking sheet for at least 15 minutes before slicing. I know waiting is torture when it smells this good, but cutting it too soon will make the filling run everywhere.
What to Serve With Cranberry and Apple Tart
In my opinion, this tart is absolutely perfect on its own, but there are some accompaniments that take it to the next level. Here’s how I like to serve it depending on the occasion.
For a Cozy Weeknight Dessert: A simple scoop of vanilla ice cream is all you need. The cold, creamy ice cream melting into the warm tart filling? That’s comfort food at its finest. I use a good quality vanilla bean ice cream because those little flecks of vanilla look pretty against the red cranberries.
For Holiday Entertaining: I go with homemade whipped cream flavored with a splash of vanilla extract and a tablespoon of powdered sugar. Sometimes I add a tiny pinch of cinnamon to the whipped cream too – it echoes the spice in the tart and makes everything taste cohesive. You could also do a dollop of crème fraîche if you want something a little tangier to balance the sweetness.
For Brunch: This might sound weird, but hear me out – a small slice of this tart alongside a cup of strong coffee and maybe some Greek yogurt is an incredible breakfast. The tartness from the cranberries wakes up your taste buds, and it feels special without being over-the-top sweet first thing in the morning.
Complete the Spread: If I’m serving this for Thanksgiving or a dinner party, I’ll often have a cheese board on the table too. A sharp white cheddar or creamy brie pairs surprisingly well with the fruit flavors. And honestly? A glass of dessert wine or a spiced apple cider on the side makes the whole experience feel extra festive.
Pro Tips from My Kitchen
After making this cranberry and apple tart more times than I can count, I’ve picked up some tricks that guarantee success every single time. Let me share the wisdom I’ve gained through trial and error (emphasis on error).
Keep Everything Cold When Making the Crust
This is the number one rule I follow religiously now. Cold butter, ice water, even a cold bowl if you have space in your fridge. Why? Cold butter creates steam pockets as it bakes, which = flaky crust. If everything gets too warm while you’re working with it, pop the dough back in the fridge for 10 minutes. It took me exactly three soggy crusts to figure this out.
Don’t Skip the Cornstarch
The cornstarch thickens the fruit juices as they cook, preventing a soggy bottom crust. I learned this lesson when I thought “eh, it’s probably fine without it” and ended up with a puddle of cranberry juice seeping through my crust. Not cute. The cornstarch also helps the filling set up nicely when cooled, so your slices actually hold together.
Slice Your Apples Thin and Uniform
I use a mandoline for this (carefully!), but a sharp knife works perfectly too. Thin, even slices (about ⅛-inch thick) mean everything cooks at the same rate. Thick chunks of apple won’t soften enough by the time the crust is golden, and then you’re stuck choosing between raw apples or burnt crust. Neither option is great.
Can I Make This Ahead of Time?
Absolutely! I actually think this tart tastes even better the next day. The flavors have time to meld together, and the crust stays surprisingly crispy if you store it properly. Just cover it loosely with foil (don’t use plastic wrap directly on the fruit – it’ll get soggy) and keep it at room temperature for up to 2 days. If you need to make it further in advance, you can freeze the unbaked tart for up to a month, then bake it straight from frozen (add 10-15 extra minutes to the baking time).
The Secret to Extra Flavor
Here’s what took me years to figure out: roast your apples for 10 minutes before adding them to the tart. I know, it’s an extra step, but it concentrates their flavor and removes some moisture, which means a better texture in the final tart. Toss the apple slices with a tablespoon of butter and roast at 400°F until just starting to soften. Game. Changer.
My Foolproof Timing Trick
Set a timer for 40 minutes, then check every 5 minutes after that. You’re looking for three things: deeply golden crust, visible bubbling in the center of the fruit, and those gorgeous caramelized edges. If the crust is browning too quickly but the fruit isn’t bubbling yet, tent the edges with foil and continue baking. I keep a piece of foil ready by the oven just in case.
Storing and Keeping It Fresh
Let’s talk about what to do with leftovers – if you have any, which honestly isn’t guaranteed with this tart. The good news is that it stores really well and even improves slightly after a day.
At Room Temperature: This is my preferred storage method for the first day or two. Once the tart has cooled completely, I cover it loosely with aluminum foil and keep it on my counter. It stays fresh for up to 48 hours this way. The crust maintains its texture better at room temperature than in the fridge, and the fruit filling is perfectly set but not stiff.
In the Refrigerator: If you need to keep it longer than two days, or if your kitchen is particularly warm, refrigerate it. Wrap it well in foil or transfer slices to an airtight container. It’ll last up to 5 days this way. Fair warning though – the crust will soften slightly in the fridge. Not a dealbreaker, just something to be aware of.
Freezing for Later: You can definitely freeze baked tart slices. I wrap individual pieces tightly in plastic wrap, then foil, and freeze for up to 3 months. Thaw overnight in the fridge, then warm in a 300°F oven for about 10 minutes to crisp up the crust again.
Best Way to Reheat: If you want to serve leftover tart warm (highly recommend), pop a slice in a 325°F oven for 8-10 minutes. The microwave works in a pinch, but you’ll lose that crispy crust texture. I’ve learned to plan ahead and reheat in the oven while I’m brewing coffee or cleaning up dinner – the timing works out perfectly.
Variations Worth Trying
Once you’ve mastered the basic cranberry and apple tart, there are so many fun ways to mix things up. I’ve experimented with quite a few variations, and here are my favorites.
Add Some Crunch
Sprinkle ⅓ cup of chopped pecans or walnuts over the fruit before folding up the crust. The nuts toast as the tart bakes and add this incredible texture contrast. My dad, who’s not usually a “fruit dessert person,” actually requests this version specifically.
Make It Extra Spiced
Love warm spices? Add ¼ teaspoon each of ground ginger and nutmeg along with the cinnamon. It gives the tart a more complex, almost gingerbread-like flavor that’s perfect for the holidays. I made this version for Christmas last year and people went crazy for it.
Try Different Fruits
The formula works beautifully with other fruit combinations. I’ve done pear and cranberry (so elegant), mixed berries with a touch of lemon zest, and even peach and raspberry in the summer. Just keep the proportions similar – about 5 cups of fruit total, with ¾ cup sugar adjusted to taste depending on the sweetness of your fruit.
Glaze It Up
For an extra-fancy presentation, warm 3 tablespoons of apricot jam with a teaspoon of water until it’s pourable, then brush it over the fruit as soon as the tart comes out of the oven. It creates this gorgeous, glossy finish that looks super professional. I save this trick for special occasions because it’s basically dessert jewelry.
Recipe FAQs
Can I use store-bought crust?
Absolutely, and I won’t judge you one bit. A sheet of store-bought pie dough or puff pastry works perfectly here. I’ve done it when I’m short on time, and while homemade crust is special, the tart is still delicious with store-bought. Just thaw it according to package directions and roll it out as needed.
What if I don’t have fresh cranberries?
Frozen cranberries work just as well – use them straight from the freezer without thawing. Dried cranberries won’t work for this recipe though, as they won’t provide enough moisture or that tart flavor we’re after. If cranberries are out of season, I buy a few extra bags when they’re available and stash them in my freezer.
Why did my crust shrink?
This usually happens when the dough is overworked or stretched too thin while rolling. Make sure you’re rolling gently and not pulling or stretching the dough to reach the size you need. Also, letting the dough rest in the fridge before baking helps relax the gluten and prevents shrinkage.
Can I make this dairy-free?
Yes! Use coconut oil or vegan butter in the crust, and skip the butter pieces on top of the fruit (they’re not essential). The crust won’t be quite as flaky, but it’ll still be delicious. I’ve made this for my lactose-intolerant friend using this method and she loved it.
How do I know if my tart is actually done?
Look for these three signs: the crust should be deeply golden (not pale), the fruit should be actively bubbling in the center (not just at the edges), and if you insert a knife into an apple piece, it should slide through easily. When I was learning, I’d take it out too early because I was scared of burning it, but a deeply golden crust is what you want.
What’s the best type of baking sheet to use?
I prefer a light-colored, heavy-duty baking sheet lined with parchment paper. Dark baking sheets can cause the bottom crust to brown too quickly. If you only have dark pans, reduce the oven temperature by 25°F and watch the bottom carefully.
Final Thoughts
This cranberry and apple tart has become one of those recipes I turn to again and again, and I think it will for you too. It’s impressive enough for company but easy enough for a random Wednesday when you need something special. The combination of tart cranberries, sweet apples, and buttery crust just works, plain and simple.
I’d love to hear how your tart turns out! Do you keep it classic or try one of the variations? Are you team ice cream or team whipped cream? Drop a comment below and let me know – I genuinely read and respond to every single one.
Now go preheat that oven. Your kitchen is about to smell incredible.