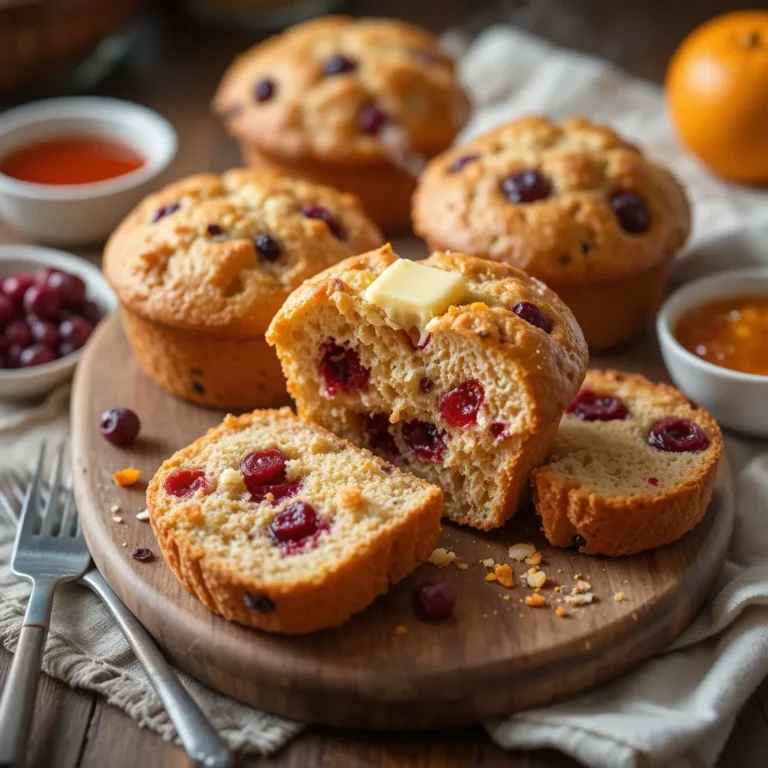
Easy Cranberry Jam Cake – Step-by-Step Guide
There’s something magical about a cranberry jam cake that makes every bite feel like a warm hug on a chilly afternoon. This stunning dessert combines the tangy sweetness of cranberry jam with a moist, tender crumb that practically melts in your mouth.
I stumbled upon this recipe during a holiday gathering when my aunt brought her famous cake, and I’ve been obsessed ever since. What makes this cranberry jam cake truly special is its simplicity – you don’t need fancy techniques or hard-to-find ingredients, just a mixing bowl and about 15 minutes of prep time.
Perfect for both seasoned bakers and kitchen newbies, this cake rivals my popular [lemon blueberry cake] in terms of crowd-pleasing power. Trust me, once you try this, it’ll become your go-to dessert for every occasion!
What is Cranberry Jam Cake?
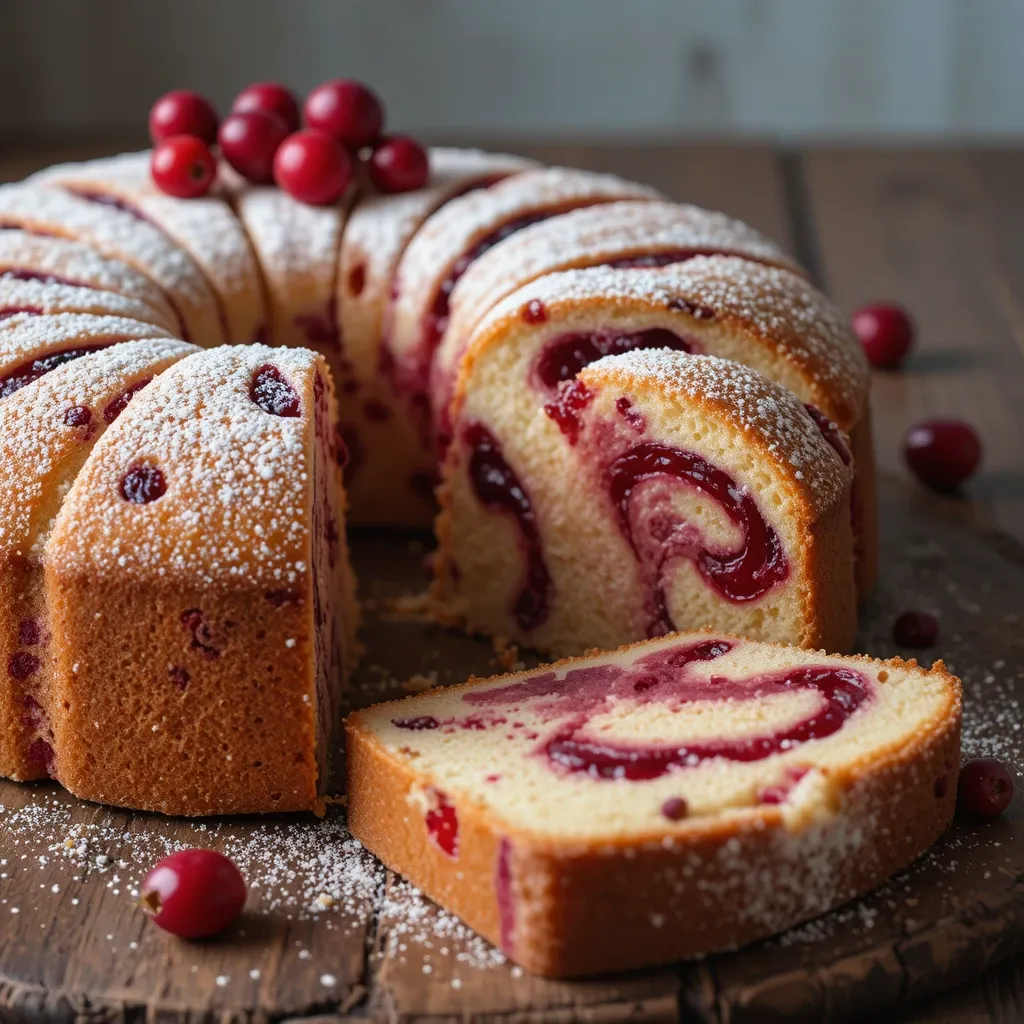
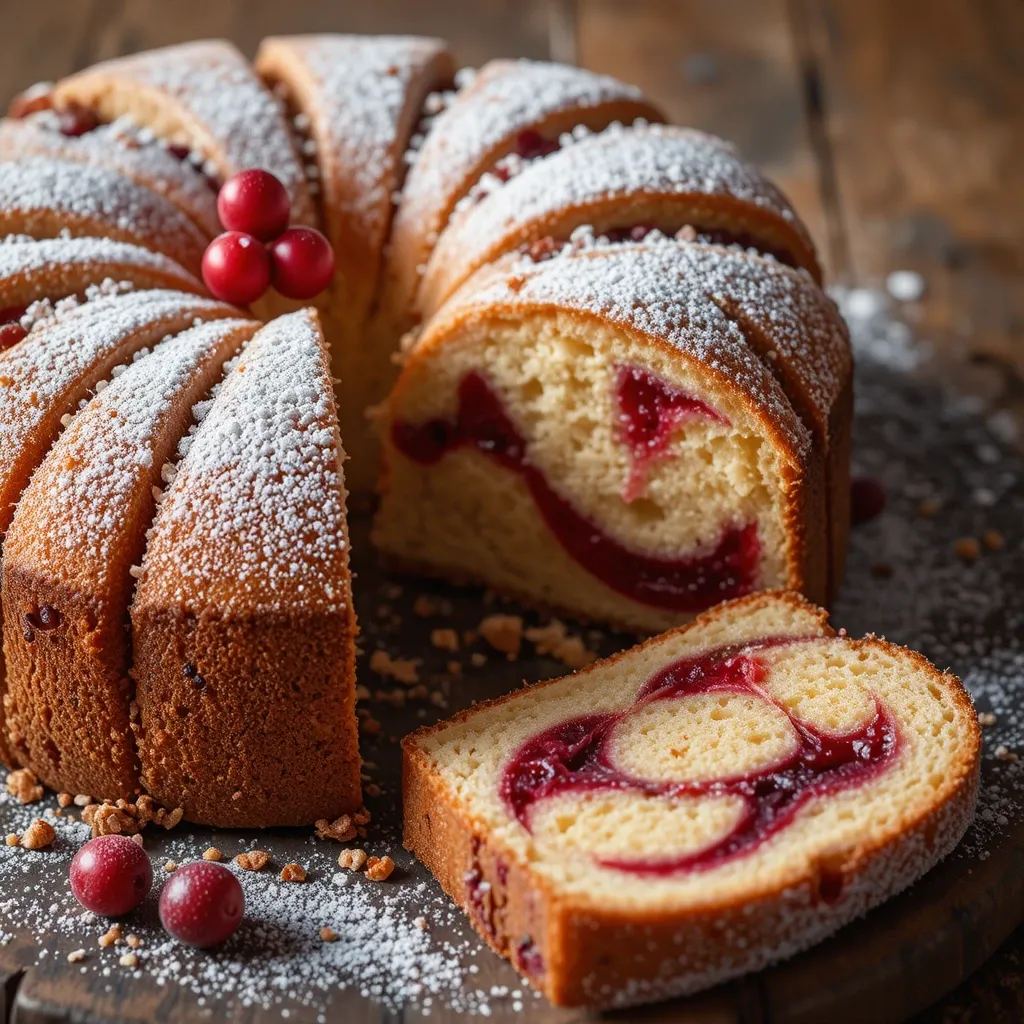
Ever wondered why we call it cranberry jam cake and not just “cranberry cake”? Well, the secret’s in the name! This delightful creation gets its incredible moisture and tangy-sweet flavor from generous swirls of cranberry jam baked right into the batter. It’s not just topped with jam or filled with it – the jam becomes part of the cake’s soul, if you will.
My grandmother always said, “the way to a man’s heart is through his stomach,” and honestly, this cake proves her right every single time. The beautiful ruby streaks running through each slice make it look like you spent hours in the kitchen, when really, it’s one of the easiest cakes you’ll ever make. Ready to impress everyone at your next gathering? Let’s get baking!
Why You’ll Love This Cranberry Jam Cake
The Perfect Balance of Tart and Sweet
This cranberry jam cake hits that sweet spot between tangy and sugary that makes your taste buds dance. The natural tartness of cranberries cuts through the sweetness beautifully, creating a sophisticated flavor profile that’s never cloying. Each forkful delivers a burst of fruity goodness that keeps you coming back for more.
Budget-Friendly Baking
Forget those expensive bakery cakes that cost upwards of $40! Making this cranberry jam cake at home will only set you back about $8-10, and you’ll have enough to feed 10-12 people. You probably already have most ingredients in your pantry – flour, sugar, eggs, butter – and a jar of cranberry jam is usually under $4. Plus, homemade always tastes better because you control the quality of every ingredient.
Stunning Presentation with Minimal Effort
The gorgeous marbled effect created by the cranberry jam swirl makes this cake look bakery-worthy without any fancy decorating skills. Top it with a simple cream cheese frosting, a dusting of powdered sugar, or even a dollop of whipped cream, and you’ve got a showstopper. If you loved my [chocolate swirl pound cake], you’ll absolutely adore how this cranberry version turns out even more photogenic with its vibrant red ribbons.
Whether you’re planning a holiday brunch, Sunday dinner, or just treating yourself to something special, this cranberry jam cake delivers every time. Don’t just take my word for it – roll up your sleeves and create some magic in your kitchen today!
How to Make Cranberry Jam Cake
Quick Overview
This cranberry jam cake is incredibly forgiving and comes together in under 20 minutes of active prep time. The magic happens in your oven where the jam creates beautiful swirls throughout the tender, buttery cake. What I love most is how the cranberry jam keeps everything moist for days – no dry cake here! The slight tang from the cranberries balances perfectly with the sweet vanilla cake base.
Preparation Time:
- Prep Time: 15 minutes
- Baking Time: 45-50 minutes
- Cooling Time: 30 minutes
- Total Time: 1 hour 35 minutes
Key Ingredients for Cranberry Jam Cake
For the Cake:
- 2 cups all-purpose flour
- 1 ½ cups granulated sugar
- ¾ cup unsalted butter, softened to room temperature
- 3 large eggs, room temperature
- 1 cup whole milk, room temperature
- 2 teaspoons vanilla extract
- 2 ½ teaspoons baking powder
- ½ teaspoon salt
- ¾ cup cranberry jam (plus extra for swirling)
For the Frosting (Optional):
- 8 oz cream cheese, softened
- ¼ cup unsalted butter, softened
- 2 cups powdered sugar
- 1 teaspoon vanilla extract
- 2-3 tablespoons cranberry jam for swirl

Step-by-Step Instructions
Step 1: Prepare Your Baking Setup
Preheat your oven to 350°F (175°C). This is crucial – you want your oven fully heated before the cake goes in. Grease a 9×13 inch baking pan with butter or non-stick spray, then dust it lightly with flour. Tap out the excess. I also like to line the bottom with parchment paper for foolproof removal later. Set this aside while you prepare your batter.
Step 2: Cream the Butter and Sugar
In a large mixing bowl, add your softened butter and granulated sugar. Using an electric mixer on medium-high speed, beat them together for about 3-4 minutes until the mixture becomes pale, fluffy, and almost doubled in volume. This step incorporates air into your cake, making it light and tender. Don’t rush it – proper creaming makes all the difference between a dense cake and a cloud-like one.
Step 3: Add the Eggs
Crack your eggs into a small bowl first (trust me, you don’t want shells in your batter). Add them one at a time to your butter mixture, beating well after each addition for about 30 seconds. The mixture might look slightly curdled – that’s completely normal! Add your vanilla extract with the last egg and mix until everything is smooth and combined.
Step 4: Combine Dry Ingredients
In a separate medium bowl, whisk together your flour, baking powder, and salt. Whisking distributes the baking powder evenly, ensuring your cake rises uniformly. This takes just 30 seconds but makes a real difference in the final texture.
Step 5: Alternate Adding Wet and Dry
Here’s where technique matters. Add about one-third of your flour mixture to the butter-egg mixture and mix on low speed just until you see a few streaks of flour remaining. Pour in half of your milk and mix gently. Add another third of the flour, then the remaining milk, and finally the last portion of flour. Mix each addition only until just combined – overmixing develops gluten and creates a tough, chewy cake. The batter should be smooth but still thick enough to hold its shape.
Step 6: Create the Jam Swirl
Pour about three-quarters of your batter into the prepared pan and spread it evenly with a spatula. Warm your cranberry jam in the microwave for about 15 seconds – this makes it easier to swirl. Drop spoonfuls of jam randomly over the batter surface, using about ½ cup. Pour the remaining batter over the jam in dollops, then use a butter knife or skewer to create swirls. Insert the knife into the batter and make figure-eight motions and zigzags across the pan. Don’t overmix – you want distinct swirls, not a uniform pink cake.
Step 7: Bake to Perfection
Place your cake in the center of the preheated oven and bake for 45-50 minutes. The cake is done when the edges pull away slightly from the pan, the top springs back when gently pressed, and a toothpick inserted into the center comes out with just a few moist crumbs (not wet batter). The cranberry jam areas might make the toothpick slightly sticky – that’s okay! Start checking at 42 minutes to avoid overbaking.
Step 8: Cool and Frost
Remove the cake from the oven and let it cool in the pan on a wire rack for about 15 minutes. This prevents it from breaking apart when you remove it. After 15 minutes, you can either leave it in the pan or turn it out onto the rack to cool completely.
If frosting, wait until the cake is completely cool (at least 30 minutes) or the frosting will melt. For cream cheese frosting, beat softened cream cheese and butter until fluffy, gradually add powdered sugar, mix in vanilla, and spread over the cooled cake. Swirl in a little extra cranberry jam on top for a gorgeous finish.
What to Serve Cranberry Jam Cake With
This cranberry jam cake is versatile enough to shine at any occasion. For a cozy afternoon tea, serve it with freshly brewed Earl Grey or chamomile tea and watch the flavors complement each other beautifully. The tartness of the cranberries pairs wonderfully with the floral notes in tea.
During holiday gatherings, I love serving this alongside a scoop of vanilla bean ice cream or a generous dollop of freshly whipped cream. The cold, creamy element balances the cake’s sweetness perfectly. For an extra indulgent treat, try it with a drizzle of warm custard or crème anglaise.
If you’re hosting brunch, this cake works beautifully with fresh coffee, mimosas, or mulled apple cider. The cranberry flavor feels especially festive during fall and winter months. Consider adding a side of mixed berry compote or fresh orange segments to brighten the plate.
For a more substantial dessert experience, pair it with cheese – yes, cheese! A small wedge of creamy brie or tangy goat cheese creates an unexpectedly delicious combination with the sweet-tart cake. It’s a sophisticated pairing that always impresses dinner guests.
Top Tips for Perfecting Cranberry Jam Cake
Use Room Temperature Ingredients
This is the single most important tip I can give you. Cold eggs and milk won’t emulsify properly with room temperature butter, creating a curdled, separated batter that bakes unevenly. Take your eggs, milk, and butter out of the fridge at least 1-2 hours before baking. If you forget, place eggs in warm water for 5-10 minutes, and microwave milk for 20-30 seconds until lukewarm.
Choose Quality Cranberry Jam
Not all jams are created equal! Look for a jam with cranberries as the first ingredient and minimal added pectin or preservatives. Whole berry cranberry sauce can work too, but drain excess liquid first. If your jam is very thick and chunky, pulse it a few times in a food processor for easier swirling. Homemade cranberry jam works beautifully if you have it on hand.
Don’t Overmix the Batter
Once you add flour to your wet ingredients, mix only until you can’t see any more dry flour streaks. Overmixing develops gluten strands, resulting in a dense, tough, tunnel-filled cake instead of a tender crumb. Use a gentle hand and low mixer speed during this stage. A few small lumps are perfectly fine – they’ll disappear during baking.
Master the Swirl Technique
The secret to beautiful swirls is restraint. After dropping spoonfuls of jam onto your batter, make only 5-6 swirling motions with your knife. More than that, and you’ll mix the jam completely into the batter, losing those gorgeous ruby ribbons. Think of it like marbling – you want distinct separation, not homogeneous blending.
Test for Doneness Properly
Cranberry jam cake can be tricky to test because the jam areas stay moist. Insert your toothpick into a cakey area, not directly into a jam swirl. Look for a few moist crumbs clinging to the toothpick – that’s perfect. If the toothpick comes out completely clean, your cake might actually be slightly overbaked. The residual heat continues cooking the cake even after removing it from the oven.
Ingredient Substitutions
Running short on ingredients? Here are some tested swaps: replace whole milk with buttermilk for extra tanginess, or use sour cream thinned with a little water. Greek yogurt also works beautifully. For a dairy-free version, use coconut milk and vegan butter (I’ve had great success with this). If you don’t have cranberry jam, try raspberry, strawberry, or mixed berry preserves – they all create stunning results. You can even use orange marmalade for a completely different but equally delicious flavor profile.
Storing and Reheating Tips
Room Temperature Storage
If you plan to eat your cranberry jam cake within 2 days, simply cover it tightly with plastic wrap or aluminum foil and keep it at room temperature. The jam keeps the cake incredibly moist, so you don’t need to worry about it drying out. Make sure your storage area is cool and away from direct sunlight. If your cake has cream cheese frosting, refrigerate it instead.
Refrigerator Storage
For longer storage, refrigerate your cranberry jam cake in an airtight container or covered tightly with plastic wrap for up to 5 days. The cold temperature might firm up the texture slightly, but it’ll soften as it comes to room temperature. I actually prefer eating this cake cold straight from the fridge on hot summer days – it’s refreshing! Let refrigerated cake sit at room temperature for 20-30 minutes before serving for the best texture and flavor.
Freezing Instructions
This cake freezes beautifully for up to 3 months! Cut it into individual slices and wrap each piece tightly in plastic wrap, then place them in a freezer-safe bag or container. This way, you can thaw just what you need. For a whole cake, wrap it tightly in plastic wrap, then aluminum foil, before freezing. Freeze unfrosted cakes for best results – add frosting after thawing.
Reheating Methods
To reheat individual slices, microwave for 15-20 seconds until just warm – don’t overdo it or the cake will become rubbery. For a crispier edge, reheat slices in a 300°F oven for 8-10 minutes wrapped loosely in foil. My favorite method is actually toasting a slice lightly and spreading a little butter on top – it transforms into an incredible breakfast treat! If you froze slices, thaw them in the refrigerator overnight or at room temperature for 1-2 hours before reheating.
Common Baking Mistakes to Avoid
Using Cold Ingredients
I can’t stress this enough – cold ingredients are the enemy of a perfect cake. When cold eggs hit room temperature butter, the mixture seizes and curdles, creating an uneven texture with pockets of dense cake. Always plan ahead and let your ingredients reach room temperature naturally.
Opening the Oven Door Too Early
Resist the temptation to peek! Opening the oven door during the first 30 minutes of baking causes temperature fluctuations that can make your cake sink in the middle. The sudden rush of cold air interrupts the rising process. Only open the door to check for doneness during the last 10-15 minutes of baking time.
Incorrect Pan Size
Using a different pan size than specified changes everything – baking time, texture, and how the cake rises. A smaller pan creates a thicker cake that needs more baking time and might burn on the edges before the center cooks. A larger pan makes a thinner cake that can overbake and dry out quickly. Stick to the 9×13 inch pan for best results.
Overmixing After Adding Flour
This bears repeating because it’s such a common mistake. The moment flour meets liquid, gluten starts forming. Too much mixing creates a tough, chewy cake with tunnels and holes throughout. Mix just until combined, using a folding motion with a spatula if possible rather than an electric mixer.
Not Measuring Flour Correctly
Scooping flour directly with your measuring cup compacts it, giving you up to 25% more flour than needed. This makes your cake dry and dense. Always spoon flour into your measuring cup and level it off with a knife. Better yet, use a kitchen scale – 2 cups of flour should weigh about 240 grams.
Skipping the Parchment Paper
Even with a greased pan, cakes can stick stubbornly. Lining your pan bottom with parchment paper (after greasing) guarantees easy removal every time. Cut the parchment to fit just the bottom – no need to line the sides. This simple step prevents heartbreak when you’re trying to get your beautiful cake out of the pan.
Using Jam That’s Too Cold
Cold, thick jam doesn’t swirl easily and can create pockets that sink to the bottom of your cake. Always warm your cranberry jam slightly before adding it to the batter. Just 15-20 seconds in the microwave makes it fluid enough to create those beautiful ribbons throughout the cake.
Frequently Asked Questions
Can I use fresh cranberries instead of cranberry jam?
While fresh cranberries add beautiful texture, they’re quite tart and can make your cake too sour. If you want to use fresh berries, toss 1 cup of fresh cranberries with 2 tablespoons of sugar and fold them gently into the batter along with your jam swirls. The combination of fresh berries and jam creates incredible flavor complexity.
Why did my cake sink in the middle?
A sunken center usually means one of three things: you opened the oven door too early, your oven temperature was too low, or you used too much baking powder. Make sure your oven is properly preheated and calibrated (use an oven thermometer to check). Also, measure your baking powder precisely – too much causes the cake to rise rapidly then collapse.
Can I make this cake gluten-free?
Yes! Substitute the all-purpose flour with a 1:1 gluten-free baking flour blend that contains xanthan gum. Brands like Bob’s Red Mill or King Arthur work beautifully. The texture will be slightly different – a bit more tender and delicate – but still delicious. Don’t use almond flour or coconut flour as they won’t provide the same structure.
How do I know when the cake is fully baked?
Look for these signs: the edges pull away slightly from the pan, the top springs back when gently pressed with your finger, and a toothpick inserted into the center comes out with a few moist crumbs (not wet batter). The cake should also smell incredible – that sweet, fruity aroma is a good indicator it’s done.
Can I make this as cupcakes instead?
Absolutely! This batter makes about 18-20 cupcakes. Fill cupcake liners about two-thirds full, add a teaspoon of jam to each, swirl with a toothpick, and bake at 350°F for 18-22 minutes. Cupcakes bake faster than a full cake, so check them starting at 18 minutes. They’re perfect for parties and portion control!
What’s the best way to achieve perfect jam swirls?
The key is using slightly warmed jam and not over-swirling. Drop dollops of jam randomly across the batter, then use a butter knife to make figure-eight and zigzag patterns. Make only 5-6 swirling motions total. If you swirl too much, you’ll incorporate the jam completely into the batter and lose those gorgeous ribbons.
Can I reduce the sugar in this recipe?
I wouldn’t recommend reducing it by more than ¼ cup. Sugar doesn’t just add sweetness – it also affects texture, moisture, and how the cake browns. With less sugar, you’ll get a drier, tougher cake that doesn’t brown as nicely. Since cranberries are naturally tart, the sweetness in this recipe is actually well-balanced.
My cake turned out dry. What went wrong?
Dry cake usually results from overbaking or too much flour. Start checking for doneness 5 minutes before the suggested time. Also, make sure you’re measuring flour correctly by spooning it into your measuring cup rather than scooping. Environmental factors matter too – if you live in a dry climate, you might need to add an extra tablespoon or two of milk.
Nutrition Information
| Nutrient | Per Slice (1/12 of cake) |
|---|---|
| Calories | 380 |
| Total Fat | 16g |
| Saturated Fat | 10g |
| Cholesterol | 95mg |
| Sodium | 220mg |
| Total Carbohydrates | 56g |
| Dietary Fiber | 1g |
| Sugars | 38g |
| Protein | 5g |
Nutritional values are approximate and based on unfrosted cak
This cranberry jam cake has become one of my most-requested recipes, and I know it’ll earn a permanent spot in your baking rotation too. There’s something incredibly satisfying about pulling this beautiful cake from the oven and watching everyone’s faces light up when they take that first bite. The combination of tender, buttery cake and tangy-sweet cranberry swirls is simply unbeatable.
What I love most is how forgiving this recipe is – even if you’re not an experienced baker, you’ll end up with something impressive. Those gorgeous ruby ribbons look complicated but require zero special skills. Just a few swirls with a butter knife and you’re done!
I’d love to hear how your cranberry jam cake turns out! Drop a comment below with your experience, any creative variations you tried, or questions you might have. Did you add the cream cheese frosting or keep it simple with just powdered sugar? Did you serve it warm with ice cream or cold straight from the fridge? Share your photos on social media and tag me – I genuinely get excited seeing your beautiful creations!