The Best Cranberry Tart NYT Recipe You’ll Ever Make
Picture this: It’s mid-November, and I’m standing in my kitchen surrounded by recipe printouts, determined to find the dessert that would finally impress my impossibly-hard-to-please mother-in-law at Thanksgiving. I’d tried elaborate cheesecakes, show-stopping layer cakes, even a disastrous attempt at crème brûlée (don’t ask).
Then I stumbled across the cranberry tart NYT recipe, and honestly? It was like the baking gods finally took pity on me. The first time I made this cranberry tart NYT version, I was skeptical. Could something this straightforward really deliver restaurant-quality results? Spoiler alert: it absolutely can.
After making this recipe at least eight times now (yes, I counted), I can confidently say this is the dessert that belongs in your holiday lineup. The combination of buttery, flaky crust with that sweet-tart cranberry filling and crunchy almond topping creates something that looks incredibly fancy but is surprisingly forgiving for home bakers.
What makes this particular cranberry tart special isn’t just the flavor—it’s how the recipe comes together. There’s something magical about watching fresh cranberries transform from hard, tart berries into this jammy, ruby-red filling that bubbles away in your oven. My kitchen smelled like a fancy bakery for hours after making it, and my husband kept wandering in asking when he could have “just one slice.”
Why This Cranberry Tart Deserves a Permanent Spot in Your Recipe Box
Let me be real with you: I’ve tried a lot of cranberry desserts over the years. Cranberry sauce? Sure. Cranberry bread? Good, but not exciting. But this cranberry tart NYT recipe? It’s in a completely different league. Here’s what makes it stand out from every other cranberry dessert I’ve encountered.
It Looks Impressive Without Being Difficult
The beautiful thing about this tart is that it looks like you spent hours in the kitchen, carefully crafting some elaborate French pâtisserie creation. In reality, the active hands-on time is maybe 25 minutes if you’re moving at a relaxed pace. I’ve made this on busy weeknight evenings (okay, fine,
I was testing it for like the fifth time), and it fit perfectly into my schedule. The crust comes together quickly, the filling is basically just stirring ingredients in a bowl, and the oven does most of the work.
The Flavor Balance Is Absolutely Perfect
Here’s the thing about cranberries: they’re incredibly tart on their own. Too tart, honestly. Many recipes try to compensate by dumping in tons of sugar, and you end up with something cloying and one-dimensional. This cranberry tart NYT recipe nails the sweet-tart balance. The filling has just enough sugar to tame the cranberries’ natural tartness without masking their bright, fresh flavor. Plus, the buttery crust and the slightly sweet almond topping provide contrast that makes every bite interesting.
You Can Make It Ahead (A Holiday Miracle)
I’ve been making this for three years now, and one of my favorite discoveries is that this tart actually tastes better the day after you make it. The flavors meld together, the filling sets up perfectly, and you’re not scrambling to finish dessert while your turkey’s resting. I usually make mine the night before any gathering, which means one less thing to stress about on the actual day. Trust me, your future self will thank you.
It Uses Simple, Real Ingredients
No weird stabilizers, no hard-to-find specialty items, no ingredients you can’t pronounce. This recipe relies on fresh cranberries, butter, sugar, eggs, flour, and almonds—things you probably have on hand or can easily grab at any grocery store. I love recipes that don’t require a treasure hunt through three different specialty shops.
Cranberry Tart NYT: Recipe At A Glance
| Recipe Details | |
|---|---|
| Prep Time | 20 minutes |
| Cook Time | 45 minutes |
| Total Time | 65 minutes (plus cooling) |
| Servings | 8-10 servings |
| Difficulty | Easy to Medium |
| Calories | 285 per serving |
| Protein | 4g |
| Carbs | 38g |
| Fat | 14g |
What You Need for Cranberry Tart NYT
Before we dive into the process, let’s talk about the ingredients. I’ve made this recipe enough times to know exactly which ingredients make the biggest difference and where you have some flexibility.
For the crust, you’ll want cold butter—and I mean really cold. I actually cut mine into cubes and pop it back in the fridge for 10 minutes before using it. This makes all the difference in achieving that flaky, tender texture. The crust also uses just a touch of sugar and salt, which enhances the buttery flavor without making it sweet.
The cranberry filling is where the magic happens. Fresh cranberries are non-negotiable here (frozen will work in a pinch, but don’t thaw them first). You’ll also need granulated sugar, orange zest (please don’t skip this—it adds incredible depth), and a bit of cornstarch to help the filling set properly. I once forgot the cornstarch and ended up with cranberry soup in a crust. Not my finest moment.
The almond topping provides that perfect crunchy contrast. You’ll need sliced almonds, a bit more butter, and some sugar. Some versions of this recipe call for almond flour in the topping, but I prefer the texture you get from sliced almonds—they toast beautifully and add great visual appeal.
[Insert image: Ingredients laid out on counter, styled naturally]
The Essential Ingredients:
For the Crust:
- 1½ cups all-purpose flour
- ⅓ cup granulated sugar
- ¼ teaspoon salt
- 10 tablespoons cold unsalted butter, cut into cubes
- 1 large egg yolk
- 2-3 tablespoons ice water
For the Cranberry Filling:
- 12 ounces fresh cranberries (about 3 cups)
- ¾ cup granulated sugar
- 2 tablespoons cornstarch
- 1 tablespoon orange zest (from about 1 orange)
- ¼ teaspoon salt
- 2 large eggs
- 4 tablespoons unsalted butter, melted
For the Almond Topping:
- ½ cup sliced almonds
- 2 tablespoons granulated sugar
- 1 tablespoon butter, melted

How to Make Cranberry Tart NYT From Scratch
Alright, let’s get into the actual cooking process. I’m going to walk you through this exactly how I make it in my own kitchen, including the little tricks I’ve picked up along the way.
Quick Overview
This recipe follows a pretty straightforward three-step process: make the crust, prepare the filling while the crust partially bakes, then top everything and finish baking. The whole thing takes about 65 minutes from start to finish, though you’ll want to factor in cooling time before slicing. It’s not complicated, but there are a few key moments where technique matters—and I’ll tell you exactly where to pay attention.
The Complete Process
Step 1: Prepare Your Tart Pan and Preheat
Preheat your oven to 375°F and grab a 9-inch tart pan with a removable bottom (this is crucial for easy serving later). I like to give mine a light coating of butter or cooking spray just to be safe, even though the crust has plenty of butter. Set it aside on a baking sheet—this makes it easier to move in and out of the oven and catches any drips.
Step 2: Make the Crust
In a food processor, pulse together the flour, sugar, and salt until combined. Add those cold butter cubes and pulse about 15-20 times until the mixture looks like coarse crumbs with some pea-sized butter pieces still visible. (Don’t have a food processor? You can absolutely do this by hand with a pastry cutter—it just takes a bit more elbow grease.)
Add the egg yolk and pulse a few times, then drizzle in the ice water one tablespoon at a time, pulsing between additions. You’ll know it’s ready when the dough starts to clump together when you squeeze it. It should be slightly shaggy, not a smooth ball. The first time I made this, I over-processed the dough and ended up with a tough crust. Live and learn!
Step 3: Press the Crust Into the Pan
Turn the dough out into your prepared tart pan and press it evenly across the bottom and up the sides. I use my fingers for the bottom and my knuckles for pressing it up the sides—this helps get an even thickness. The crust should be about ⅛ inch thick all around. Prick the bottom all over with a fork (this prevents bubbling), then pop it in the freezer for 10 minutes while you prep the filling.
[Insert image: Crust pressed into tart pan]
Step 4: Par-Bake the Crust
Line your chilled crust with parchment paper or aluminum foil and fill it with pie weights, dried beans, or uncooked rice. Bake for 15 minutes, then carefully remove the weights and parchment and bake for another 5 minutes until the crust just starts to turn golden. This par-baking step ensures you won’t end up with a soggy bottom (the nemesis of all tart makers). Keep the oven on—you’ll need it again shortly.
Step 5: Make the Cranberry Filling
While the crust is baking, rinse your cranberries and pick out any soft or shriveled ones. In a large bowl, whisk together the sugar, cornstarch, orange zest, and salt. The orange zest is absolutely key here—it brightens up the cranberries and adds this subtle complexity that makes people say “what IS that amazing flavor?” (Pro tip: zest the orange before you juice it for easier handling.)
Add the eggs and melted butter to the sugar mixture and whisk until smooth. Fold in the cranberries until they’re evenly coated. The mixture will look loose and runny—that’s completely normal. The cranberries release moisture as they bake, and the cornstarch thickens everything up beautifully.
Step 6: Assemble the Tart
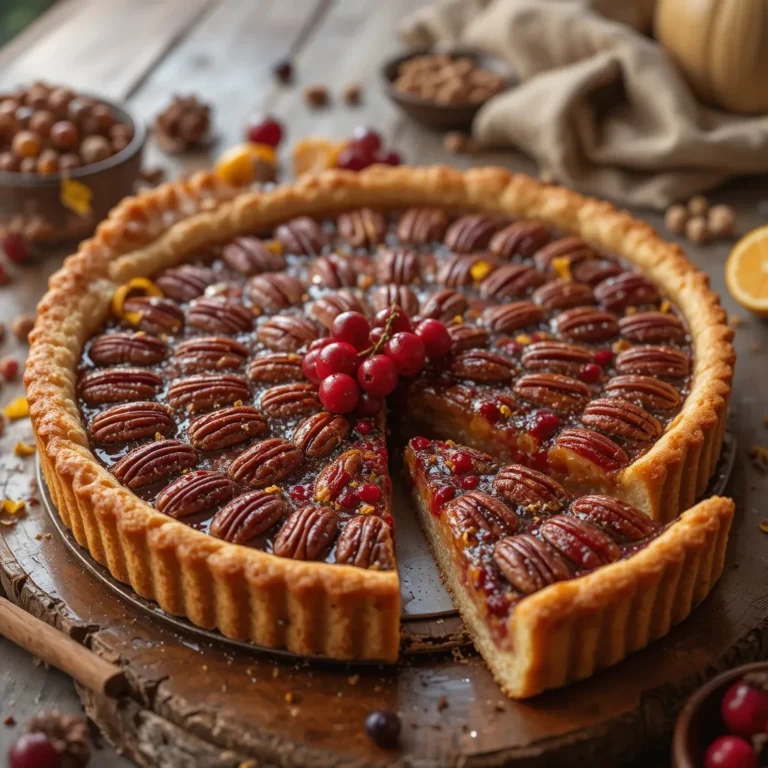
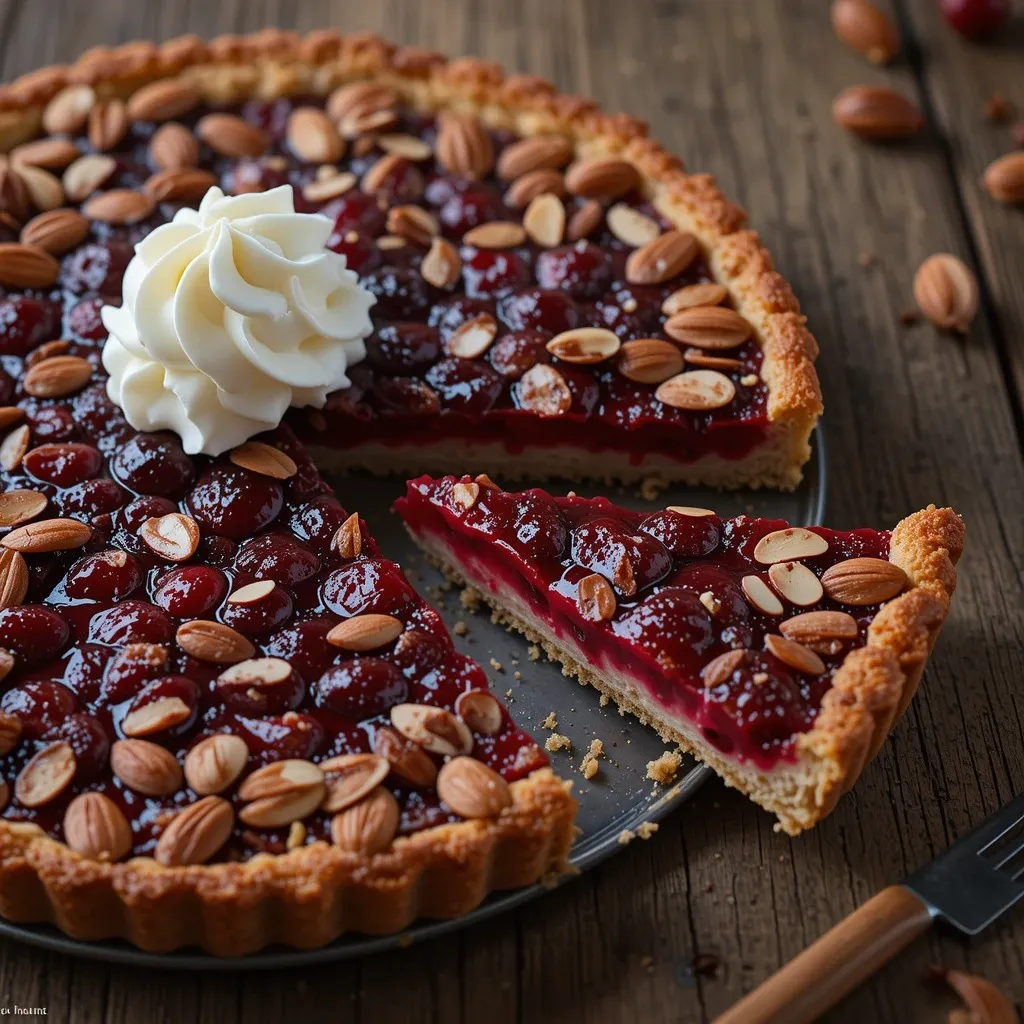
Pour the cranberry filling into your par-baked crust, spreading it out evenly. Some cranberries will want to float or cluster—just redistribute them gently with a spoon so you get even coverage. In a small bowl, toss the sliced almonds with the sugar and melted butter, then scatter this mixture evenly over the cranberry filling. It doesn’t have to be perfect—a rustic look is totally part of the charm.
[Insert image: Tart being assembled with almond topping]
Step 7: Bake to Perfection
Slide your tart back into the 375°F oven and bake for 40-45 minutes. You’ll know it’s done when the filling is bubbling around the edges, the almonds are deeply golden (watch them carefully in the last 10 minutes—they can go from perfect to burnt quickly), and a toothpick inserted into the filling comes out mostly clean with just a few moist crumbs.
Here’s something I learned the hard way: the tart will seem a bit jiggly when you first take it out. Don’t panic! That’s exactly what you want. It firms up significantly as it cools. The first time I made this, I thought I’d undercooked it because of the jiggle, and I stuck it back in for another 15 minutes. Rookie mistake—I ended up with an overbaked, slightly dry filling. Trust the timing and the visual cues.
Step 8: Cool Completely
Let the tart cool in the pan on a wire rack for at least 30 minutes, then carefully remove the outer ring of the tart pan. Let it cool completely before slicing—this usually takes about 2 hours total. I know it’s torture to wait, but cutting into a warm tart will give you messy, runny slices instead of those beautiful clean cuts you’re aiming for.
My Favorite Ways to Serve This Cranberry Tart
After making this cranberry tart NYT recipe for various occasions, I’ve discovered several serving styles that really elevate the experience. This tart is gorgeous enough to stand on its own, but the right accompaniments can transform it from “delicious dessert” to “absolutely unforgettable finale.”
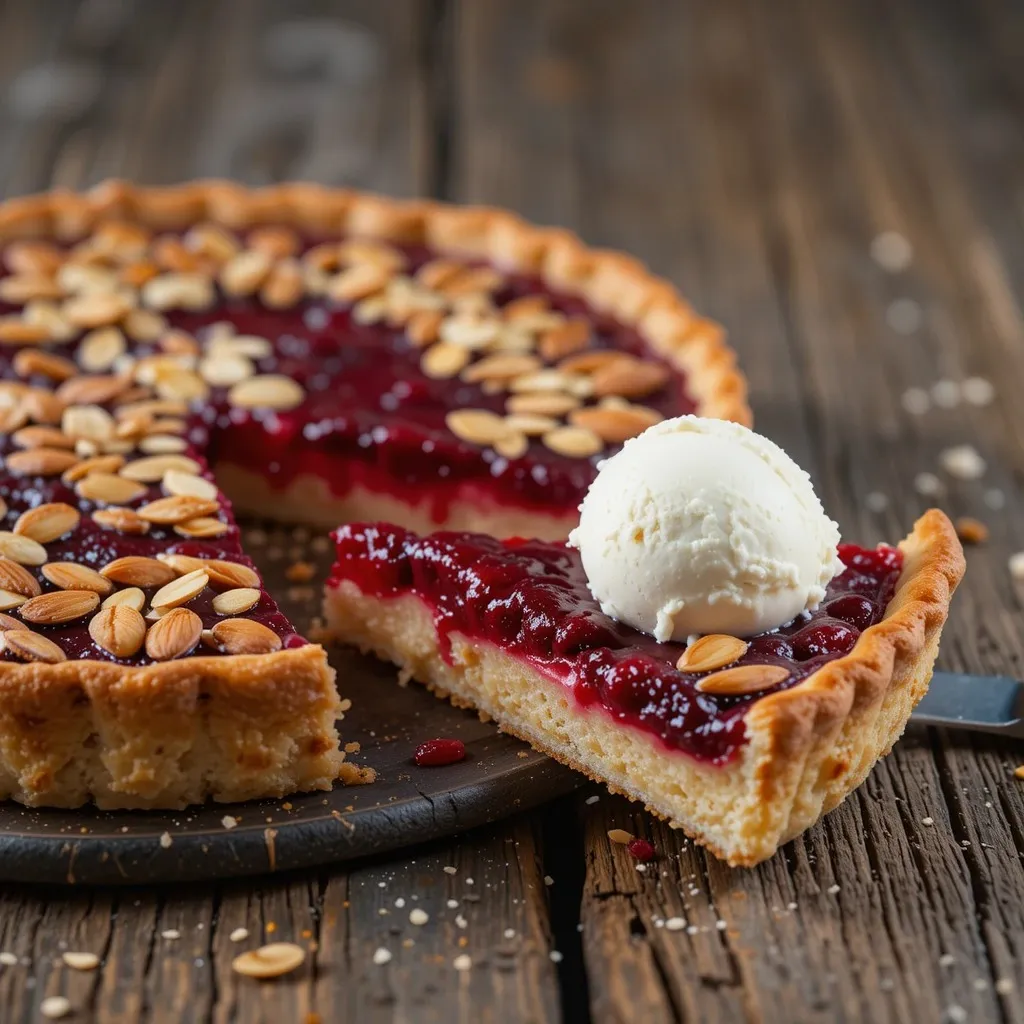
My go-to serving method is incredibly simple: a clean slice of tart with a generous dollop of barely sweetened whipped cream. The cream’s richness balances the tart cranberries perfectly. I usually whip heavy cream with just a tablespoon of powdered sugar and a splash of vanilla—you want it to complement, not compete with, the tart’s flavors.
For holiday gatherings, I’ll sometimes serve it with a scoop of vanilla bean ice cream on the side. The contrast between the warm (or room temperature) tart and cold ice cream is pretty spectacular. Plus, as the ice cream melts slightly, it mingles with the cranberry filling in a way that’s borderline magical.
Here’s a fun variation I discovered by accident: try serving it with a small glass of sparkling wine or champagne. The bubbles and acidity of the wine actually enhance the cranberry’s brightness and cut through the richness of the buttery crust. It feels fancy without being fussy—perfect for New Year’s Eve or special dinners.
If you’re serving this as part of a larger dessert spread (like at Thanksgiving), it pairs wonderfully alongside pumpkin pie or pecan pie. The cranberry tart provides a lighter, brighter option for guests who find traditional holiday pies too heavy.
Pro Tips From My Kitchen
I’ve learned a few things through my multiple attempts at perfecting this cranberry tart NYT recipe. Some of these tips came from my own mistakes (looking at you, burnt almond topping), and others from experimentation. Here’s what actually matters.
Should You Use Fresh or Frozen Cranberries?
Fresh is always my first choice—they hold their shape better and have a brighter flavor. But I’ve absolutely made this with frozen cranberries in a pinch (like that time I decided to make it in February and couldn’t find fresh anywhere). If using frozen, don’t thaw them first. Add them directly to the filling mixture while still frozen. This prevents them from releasing too much moisture and making the filling watery.
The Secret to a Perfectly Flaky Crust
Temperature is everything. Your butter needs to be cold, your water needs to be ice-cold, and honestly, it helps if your kitchen isn’t too warm. I once tried making this crust on a sweltering August afternoon (don’t ask why I was baking a cranberry tart in August), and the butter started melting before I even got it in the pan. The result was a greasy, tough crust. If your kitchen runs warm, stick the flour in the fridge for 30 minutes before starting.
Don’t Skip the Orange Zest
I know I already mentioned this, but it bears repeating: the orange zest is not optional. It’s what transforms this from “good cranberry tart” to “wow, what IS that incredible flavor?” Even people who claim they don’t like cranberries rave about this tart, and I’m convinced the orange zest is a major reason why. It adds brightness and complexity without being obviously orange-flavored.
My Foolproof Timing Trick
Set a timer for 35 minutes when you put the filled tart in the oven. At that point, check it and rotate the pan 180 degrees (ovens have hot spots). Then watch it carefully for the last 10 minutes. The almonds can go from beautifully toasted to burnt in a matter of 2-3 minutes, especially if your oven runs hot. If the almonds are browning too quickly but the filling isn’t done, tent the tart loosely with aluminum foil.
Can You Make This Ahead?
Absolutely! In fact, this is one of those rare desserts that actually benefits from being made ahead. The filling sets up perfectly overnight, making it much easier to get clean slices. I usually make it the evening before I plan to serve it, leave it loosely covered at room temperature, and it’s ready to go the next day. You can make it up to two days ahead—just store it covered in the refrigerator and bring it back to room temperature for 30 minutes before serving.
What If Your Filling Seems Too Runny?
When you first pour the filling into the crust, it will look alarmingly liquid. This is totally normal—don’t add extra cornstarch! The cranberries release juice as they bake, and the cornstarch in the filling thickens everything as it cooks. The magic happens in the oven and continues during cooling. I’ve noticed that the filling firms up significantly in the first hour of cooling, then continues to set as it reaches room temperature.
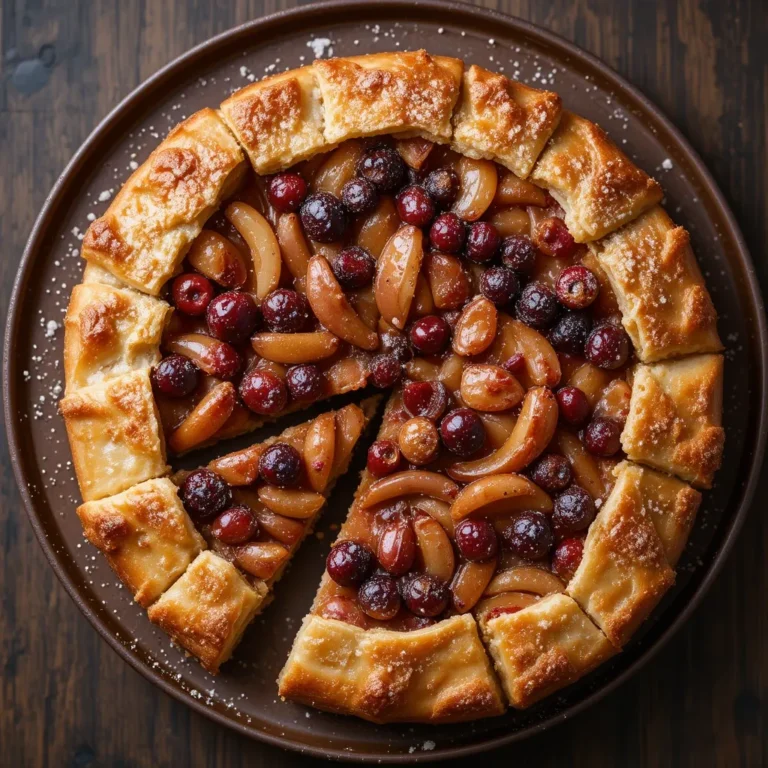
[Insert image: Perfect slice of tart on plate with whipped cream]
Make-Ahead and Storage Guide
One of the best things about this cranberry tart NYT recipe is how well it keeps. I’ve done extensive testing on this front (mostly because I kept having leftover tart, and also because I wanted to know exactly how long it stays at peak deliciousness).
Storing at Room Temperature
The tart can sit at room temperature, loosely covered with plastic wrap or aluminum foil, for up to 2 days. This is actually my preferred storage method because the crust stays crispest at room temperature. Just make sure it’s not sitting in direct sunlight or anywhere too warm. I usually keep mine on the counter under a cake dome or covered with an inverted bowl.
Refrigerator Storage
If you need to keep it longer than 2 days, or if your kitchen is particularly warm, refrigerate it covered for up to 4 days. The crust will soften slightly in the fridge, but the overall flavor remains excellent. Let it sit at room temperature for 20-30 minutes before serving—cold cranberry filling is fine, but the flavors really bloom when it’s closer to room temperature.
Can You Freeze It?
I’ve successfully frozen slices of this tart wrapped tightly in plastic wrap and then aluminum foil for up to 2 months. Thaw overnight in the refrigerator, then bring to room temperature before serving. I’ll be honest—the crust loses some of its textural magic when frozen, but it’s still delicious and way better than no cranberry tart at all.
The Best Container for Storage
I find that keeping the tart on its base (that removable bottom from the tart pan) and covering it loosely works better than transferring it to a cake keeper or other container. The tart is relatively delicate, and the fewer times you have to move it, the better.
Recipe FAQs
Can I make mini versions of this tart?
Yes! I’ve made these in 4-inch tartlet pans for dinner parties. Use the same recipe but reduce the baking time to about 25-30 minutes for the filled tarts. The crust will need about 10 minutes of par-baking. Keep a close eye on the almonds—they brown faster in smaller tarts.
What can I substitute for the almonds?
If you have a nut allergy (or just don’t like almonds), you can use the same amount of rolled oats mixed with sugar and butter. It creates a different but equally delicious crumbly topping. I’ve also tried it with chopped pecans, which was fantastic but gave it more of an American dessert vibe rather than the slightly European feel of the almond version.
My crust cracked while baking—did I do something wrong?
Small cracks in the crust are actually pretty normal and nothing to worry about. The filling will seal them as it bakes. If you’re getting major cracks or the crust is shrinking dramatically, it usually means the dough was overworked or wasn’t chilled enough before baking. Make sure to let it rest in the freezer for that full 10 minutes.
Can I use dried cranberries instead of fresh?
I wouldn’t recommend it for this particular recipe. Dried cranberries don’t have enough moisture and won’t create that jammy, cohesive filling you’re looking for. They’d also be quite chewy in texture. If you absolutely can’t find fresh or frozen cranberries, you could try using fresh or frozen raspberries or a mix of berries, though the flavor profile will be completely different.
How do I know when the filling is actually set?
The filling should bubble gently around the edges and jiggle slightly in the center when you gently shake the pan. It will seem looser than you expect—that’s okay! Remember, it continues to set as it cools. A toothpick inserted into the filling should come out with some moist crumbs but not liquid batter.
Can I add other flavors to the cranberry filling?
Absolutely! I’ve experimented with adding a quarter teaspoon of ground ginger or cinnamon to the filling, which adds nice warmth for winter holidays. A tablespoon of amaretto or Grand Marnier is also delicious if you want to make this more adult-oriented. Just replace one tablespoon of the butter with the liqueur.
Final Thoughts on This Holiday Showstopper
Here’s what I want you to know: this cranberry tart NYT recipe has become my desert island dessert—the one I’d make if I could only make one sweet thing for the rest of my life. It’s elegant enough for your fanciest dinner party but approachable enough for a casual weekend baking project. The combination of that buttery, tender crust, the sweet-tart cranberry filling, and the crunchy almond topping creates something that’s genuinely greater than the sum of its parts.
Since discovering this recipe three years ago, I’ve made it for Thanksgiving, Christmas, New Year’s Eve, random Tuesday nights when I needed a win, and once for a potluck where it disappeared so fast I barely got a slice myself. It’s the kind of recipe that makes people ask for the details, the one that converts cranberry skeptics, and the dessert that’s earned a permanent spot in my holiday rotation.
If you make this, I’d love to hear how it turns out! Do you add any special twists? Serve it with something unexpected? Drop a comment below and let me know. And if you’re looking for more holiday dessert inspiration, check out my classic pumpkin pie and chocolate pecan tart recipes—they’re both crowd-pleasers that pair beautifully with this cranberry version if you’re doing a full dessert spread.
Happy baking, and trust me—your kitchen is about to smell absolutely amazing